Sync data from Firebase to Google sheets
In one of my earlier posts, I described how to sync data from Google sheets to Firebase. In some cases, we need the inverse i.e Firebase → Google Sheets. Firebase is extremely powerful and very approachable to do such kinds of manipulations.
In this blog post, I will describe how to sync new data written to a Firebase database to a Google Sheet. It includes a method for obtaining, storing, and using Oauth2 tokens for Google API access.
Related articles
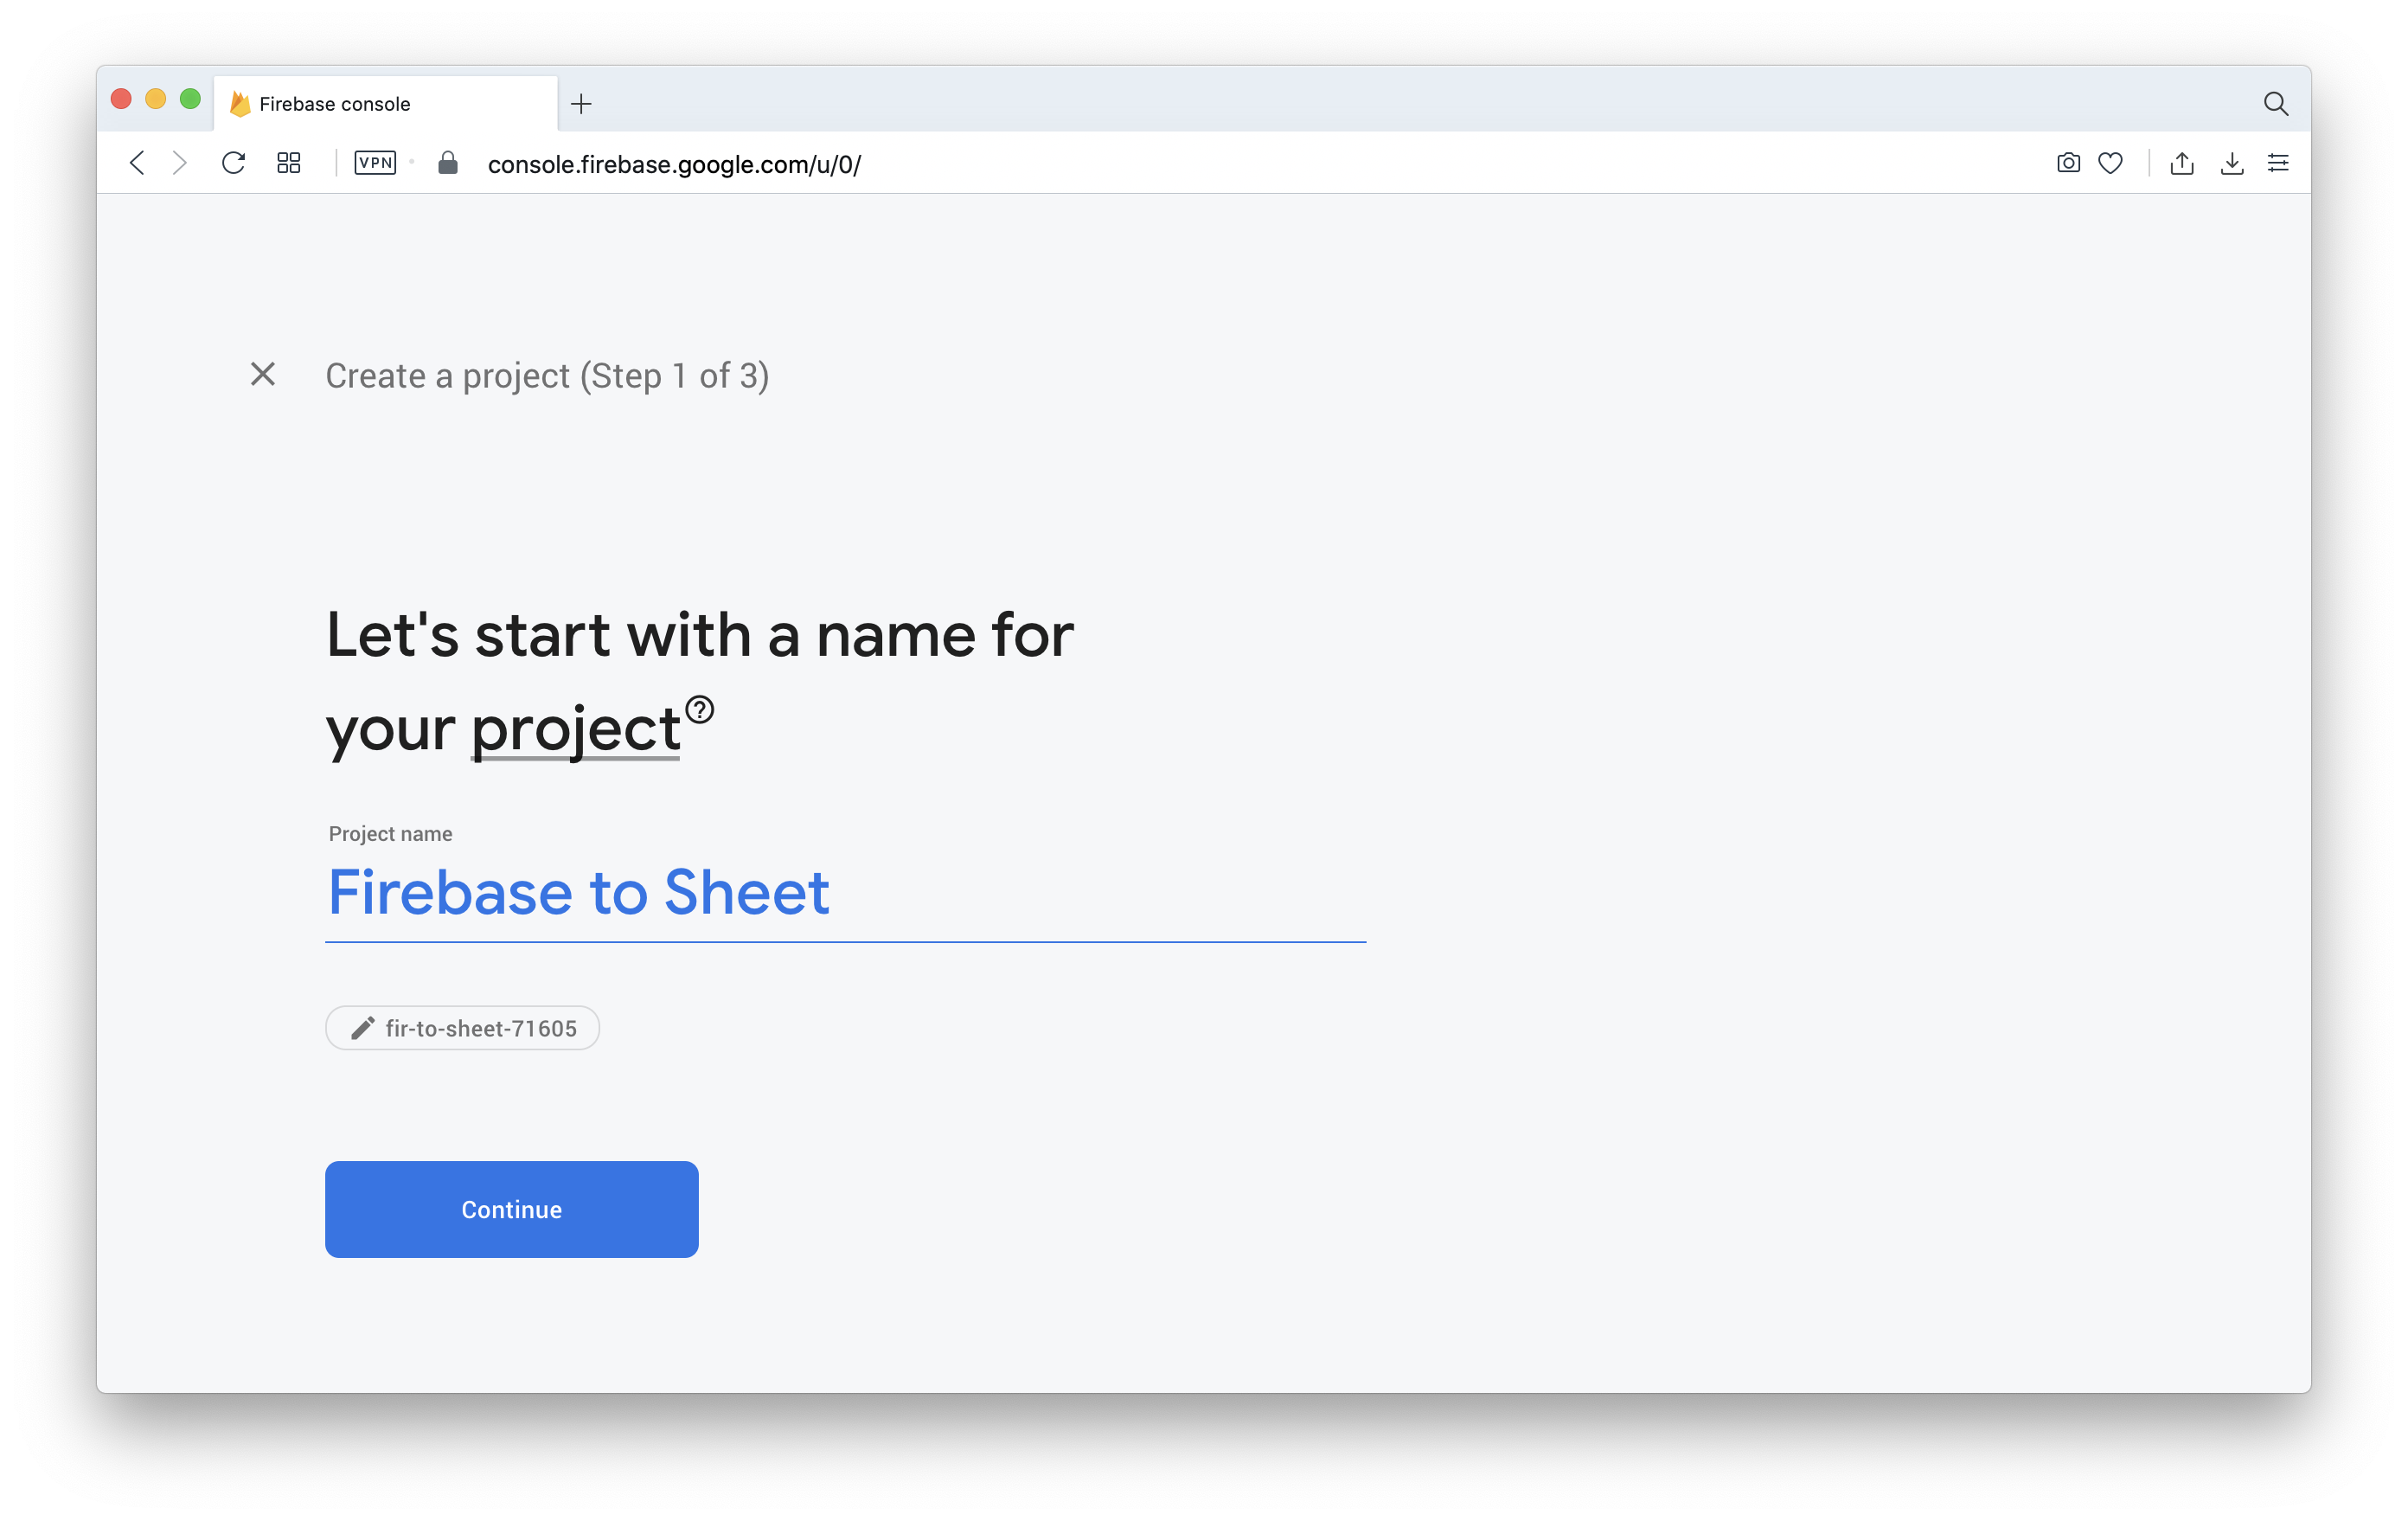
Step 1: Create your Firebase project
If you haven’t already, sign up for Firebase using the free tier and then create your project.
Firebase billing is required for cloud functions to work. You can easily upgrade to Pay as you go, just click on the upgrade button at the bottom of the sidebar.
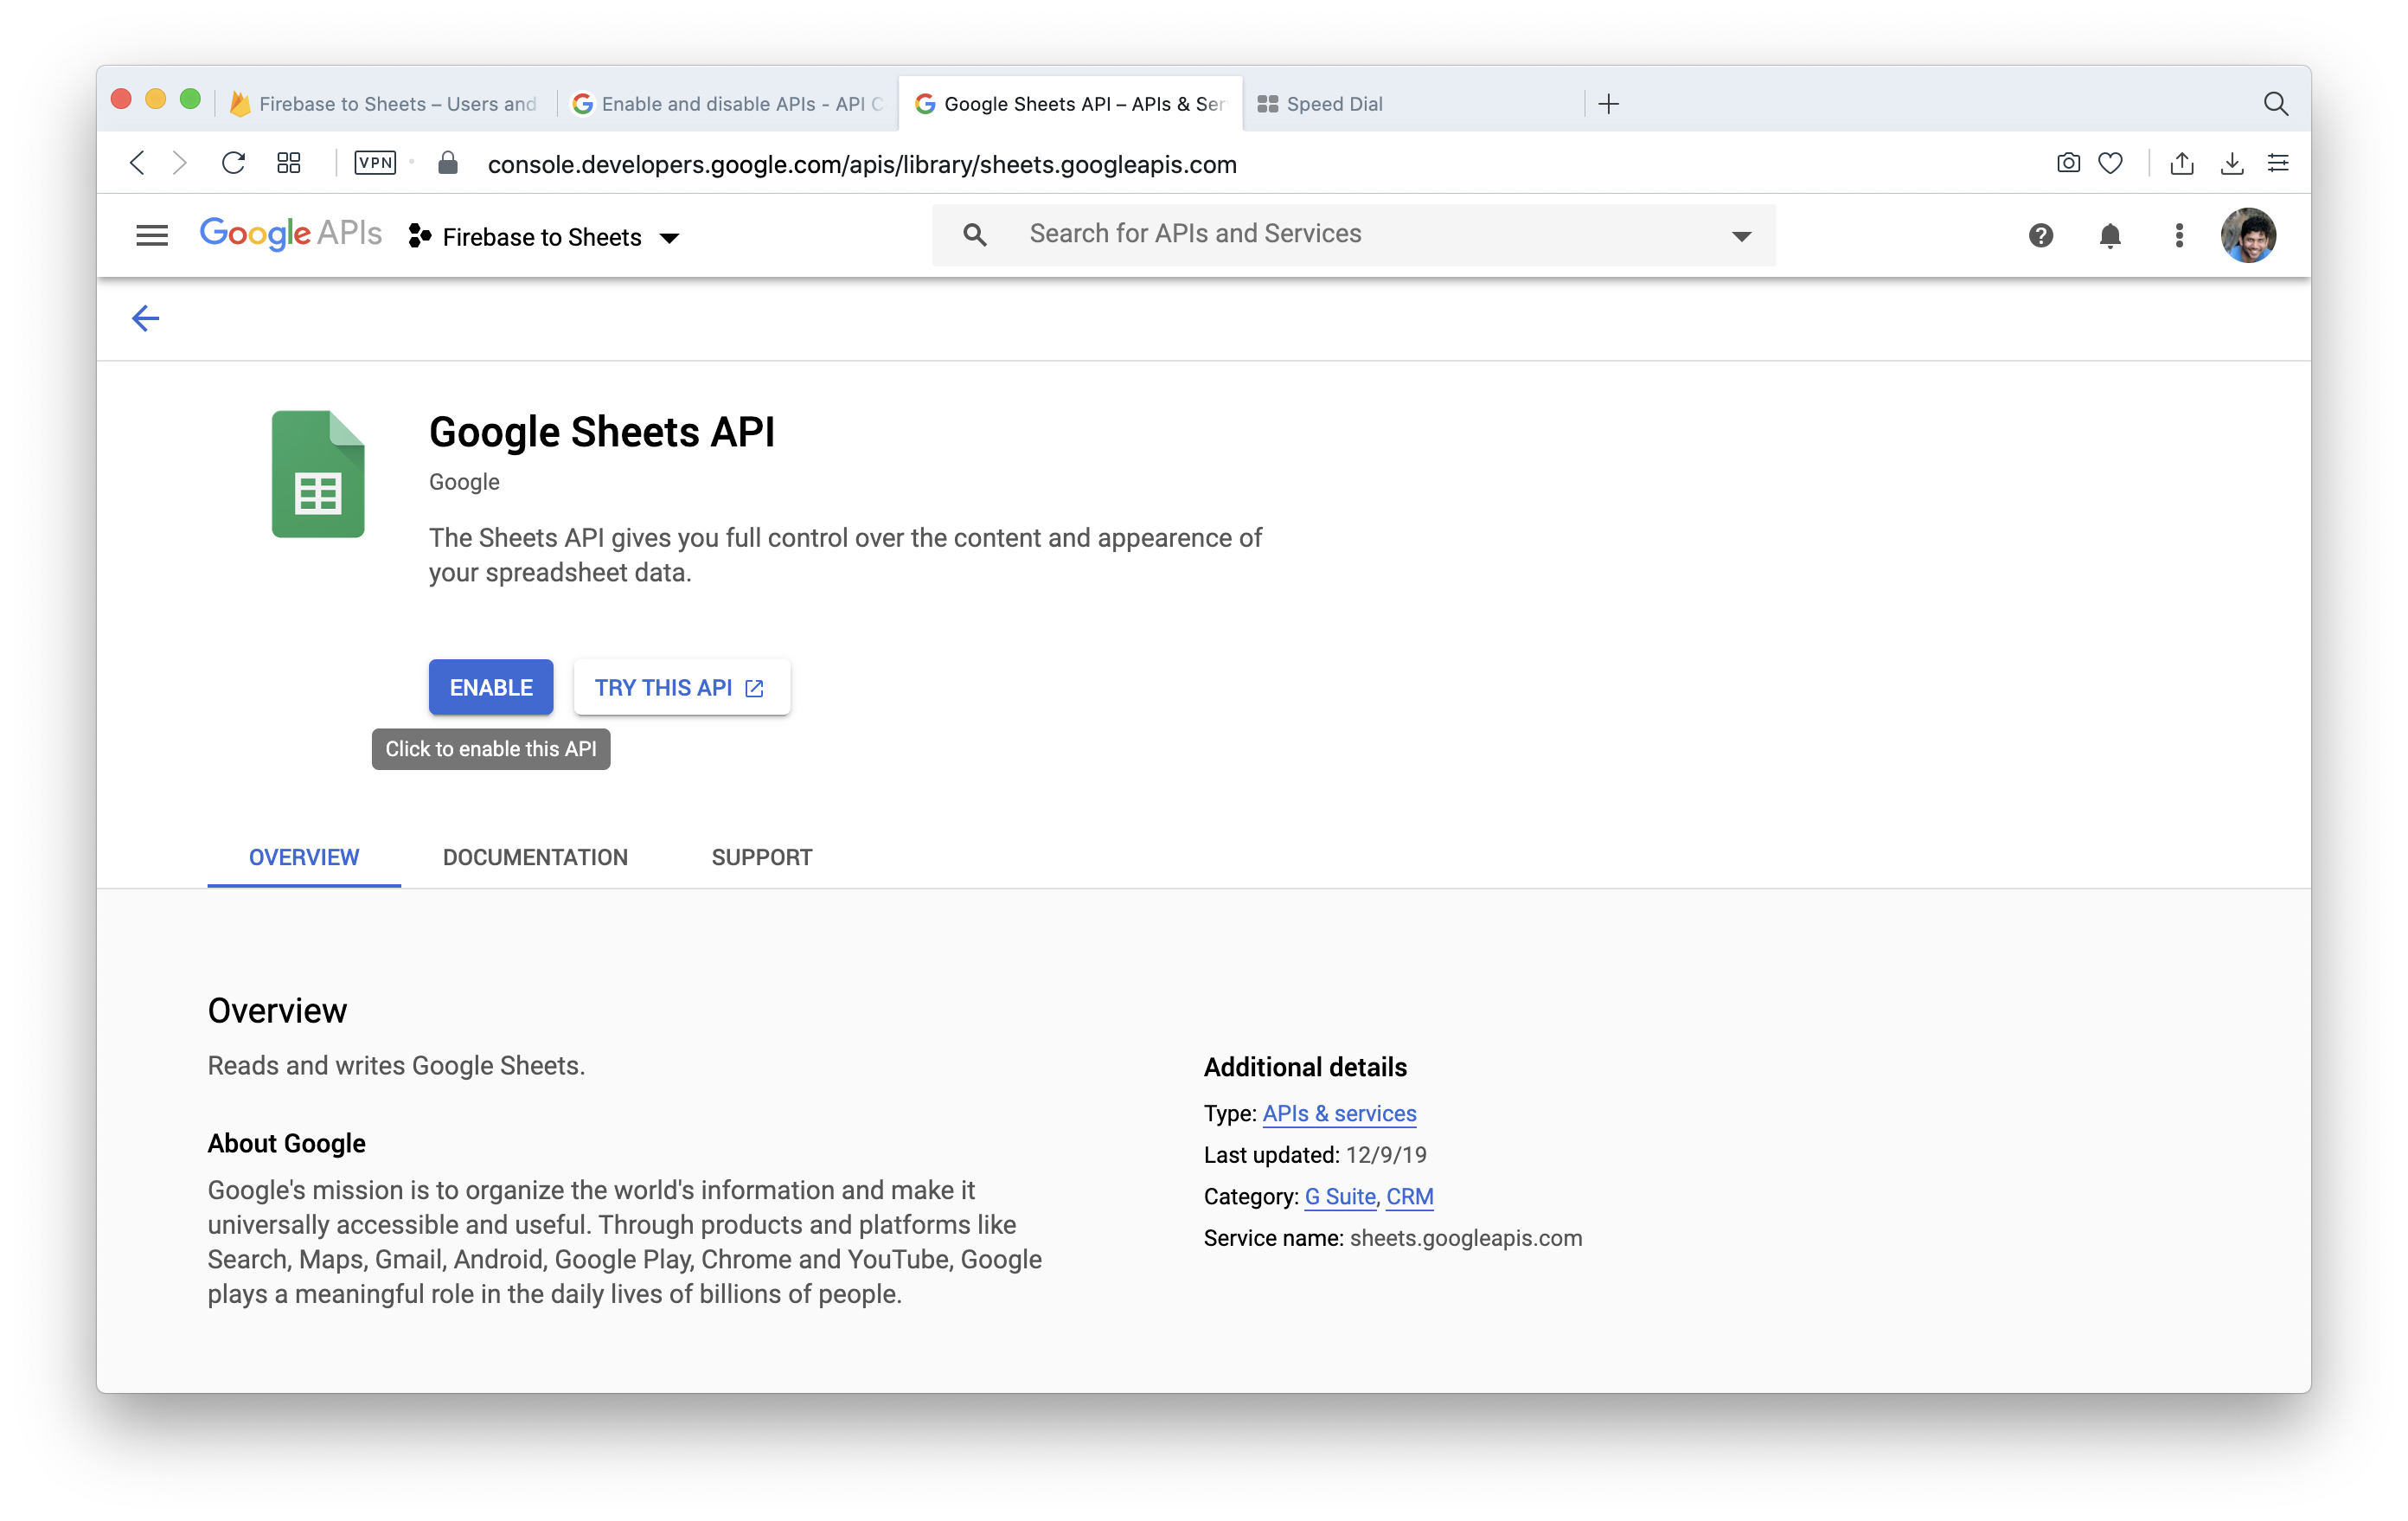
Step 2: Enable Google Sheets API
- Go to the API Console.
- From the projects list, select the newly created Firebase project.
- If the APIs & services page isn't already open, open the console left side menu and select APIs & services, and then select Library.
- Click on Enable APIs and search for Google Sheets. Or you can access the page directly.
- Click ENABLE.
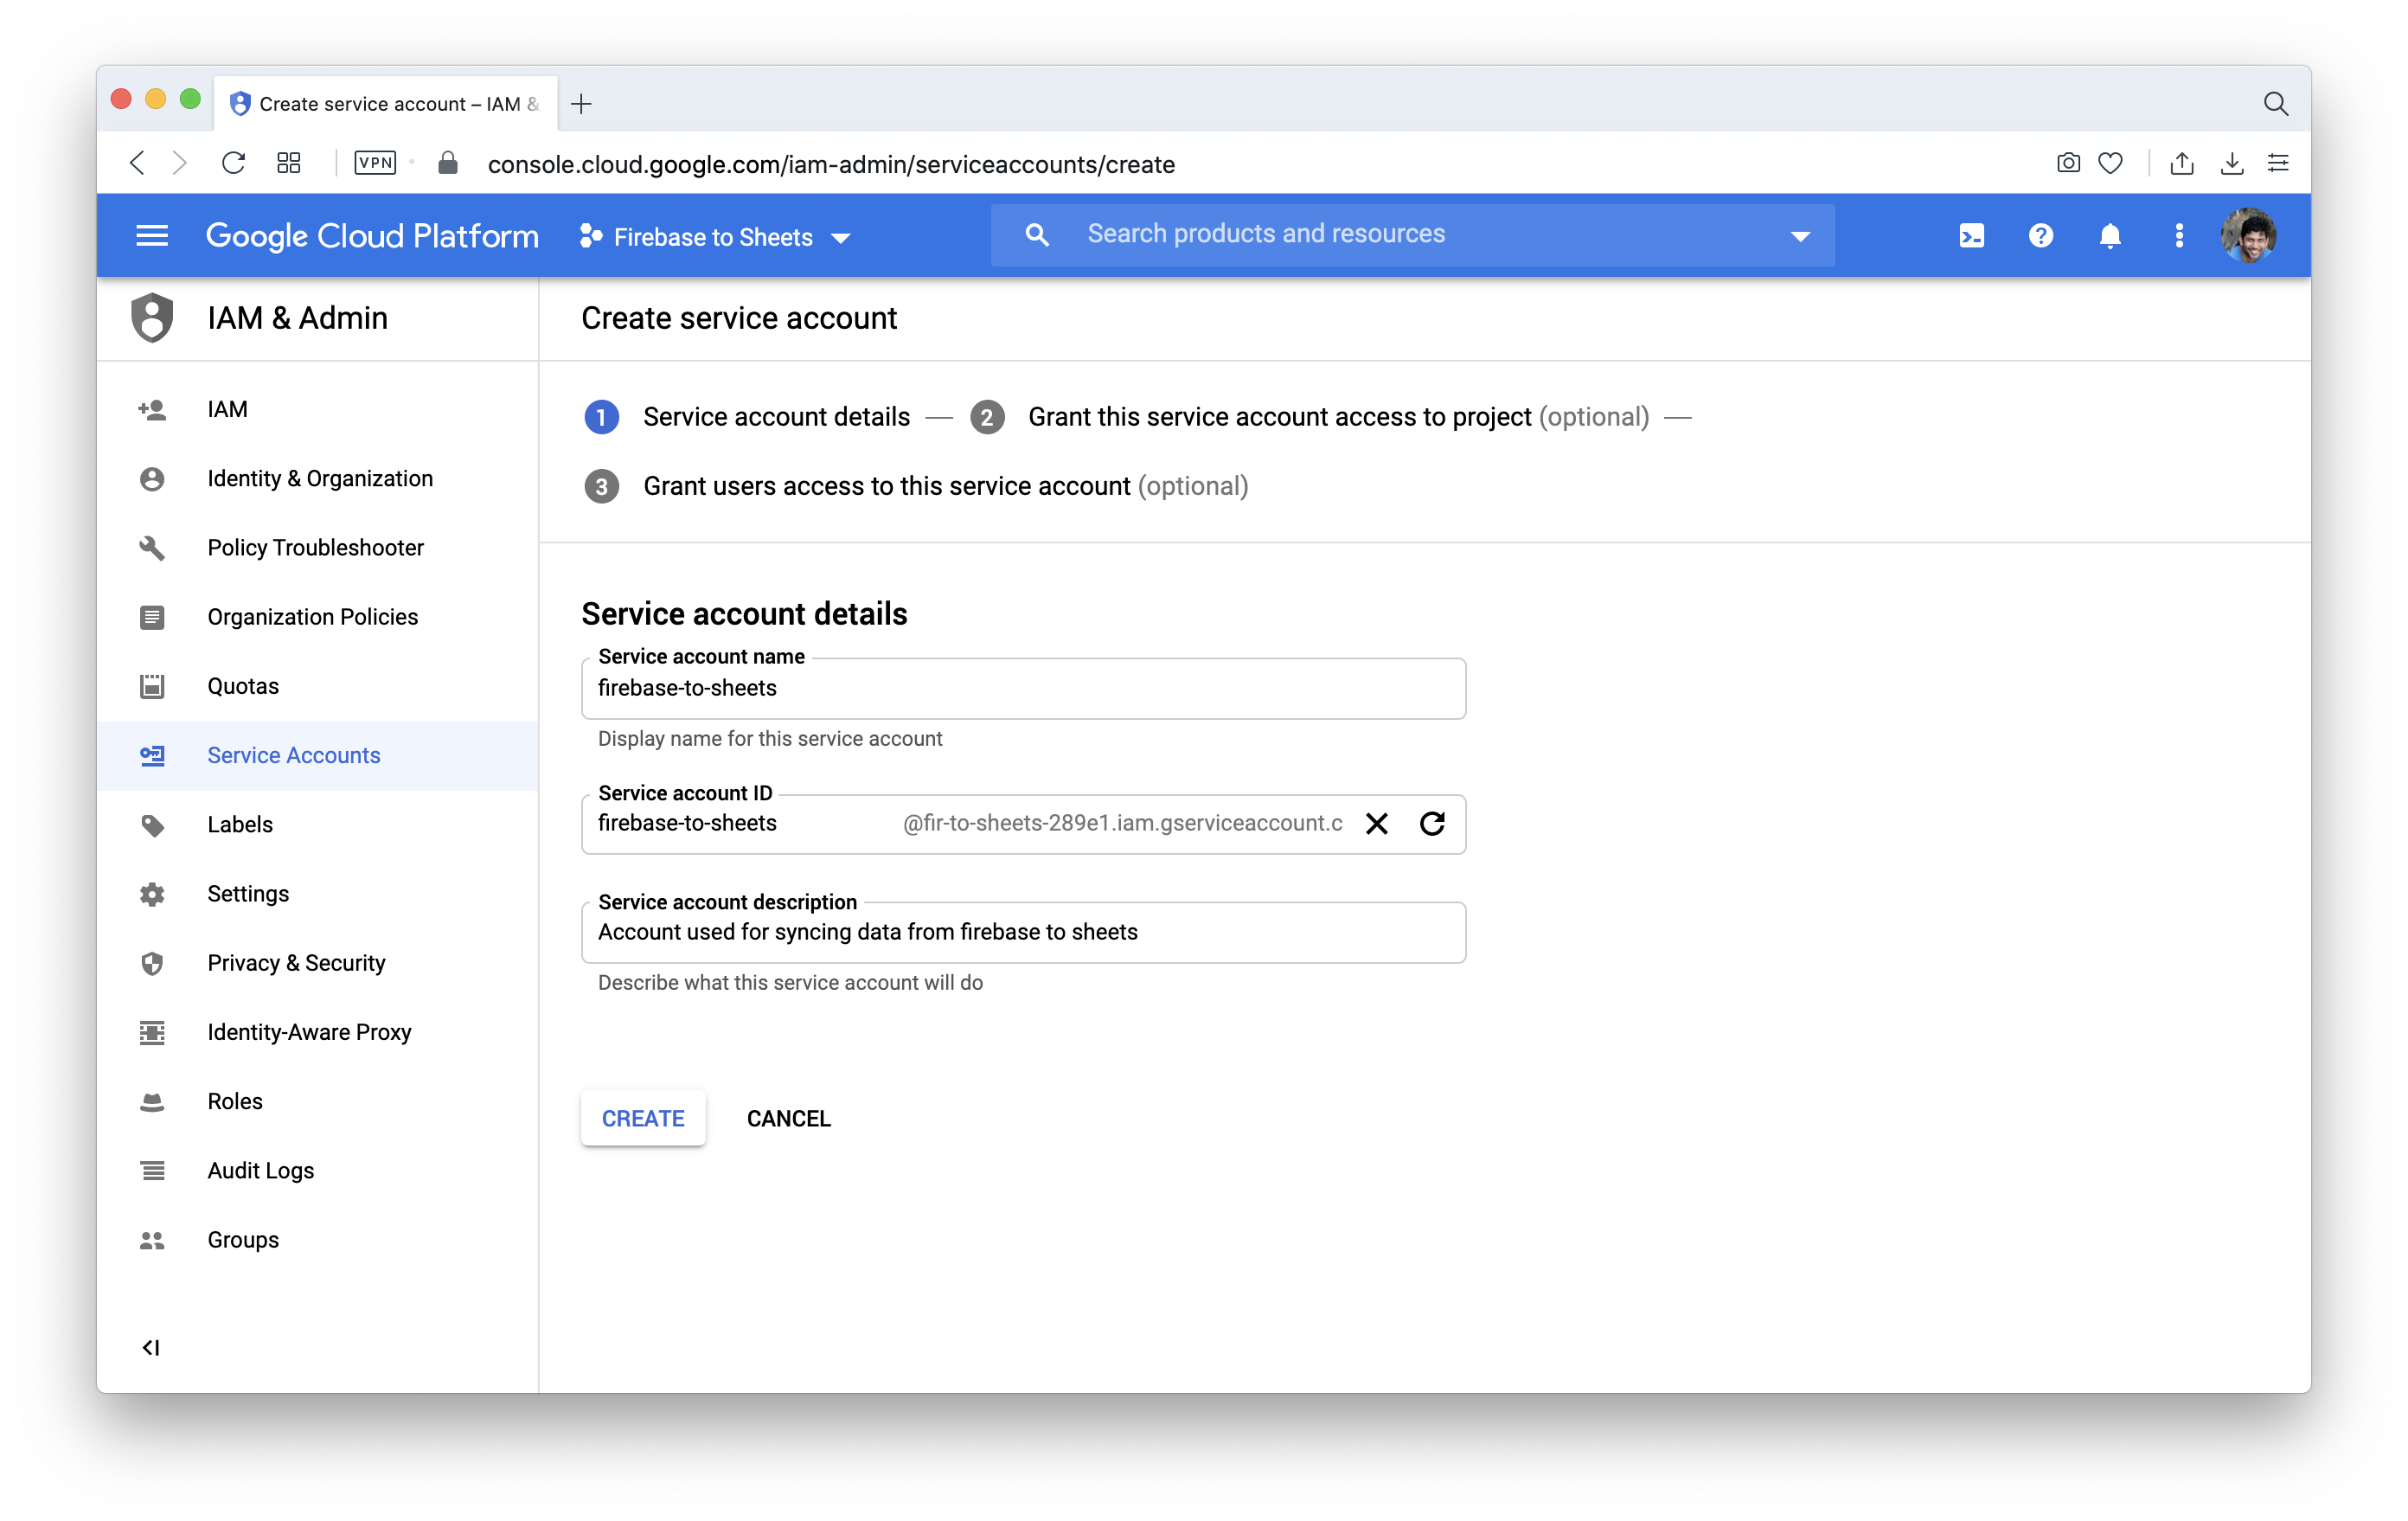
Step 3: Create a service account in your project
A service account is used in an application that calls APIs on behalf of an application that does not access user information. This type of application needs to prove its own identity, but it does not need a user to authorize requests.
- Open the API Console Credentials page.
- If it's not already selected, select the project that you're creating credentials for.
- To set up a new service account, click
New credentialsand then select Service account. - Enter the name for your service account and a clear description.
- Click continue on Service account permissions as it's optional.
- Click on Done on Grant user's access to this service account.
- You will be led back onto your credentials page and in the Service Accounts section click on the newly created account.
- In order to download the Service Account you have created a key, you can do that by selecting Add key button on the Service account details page.
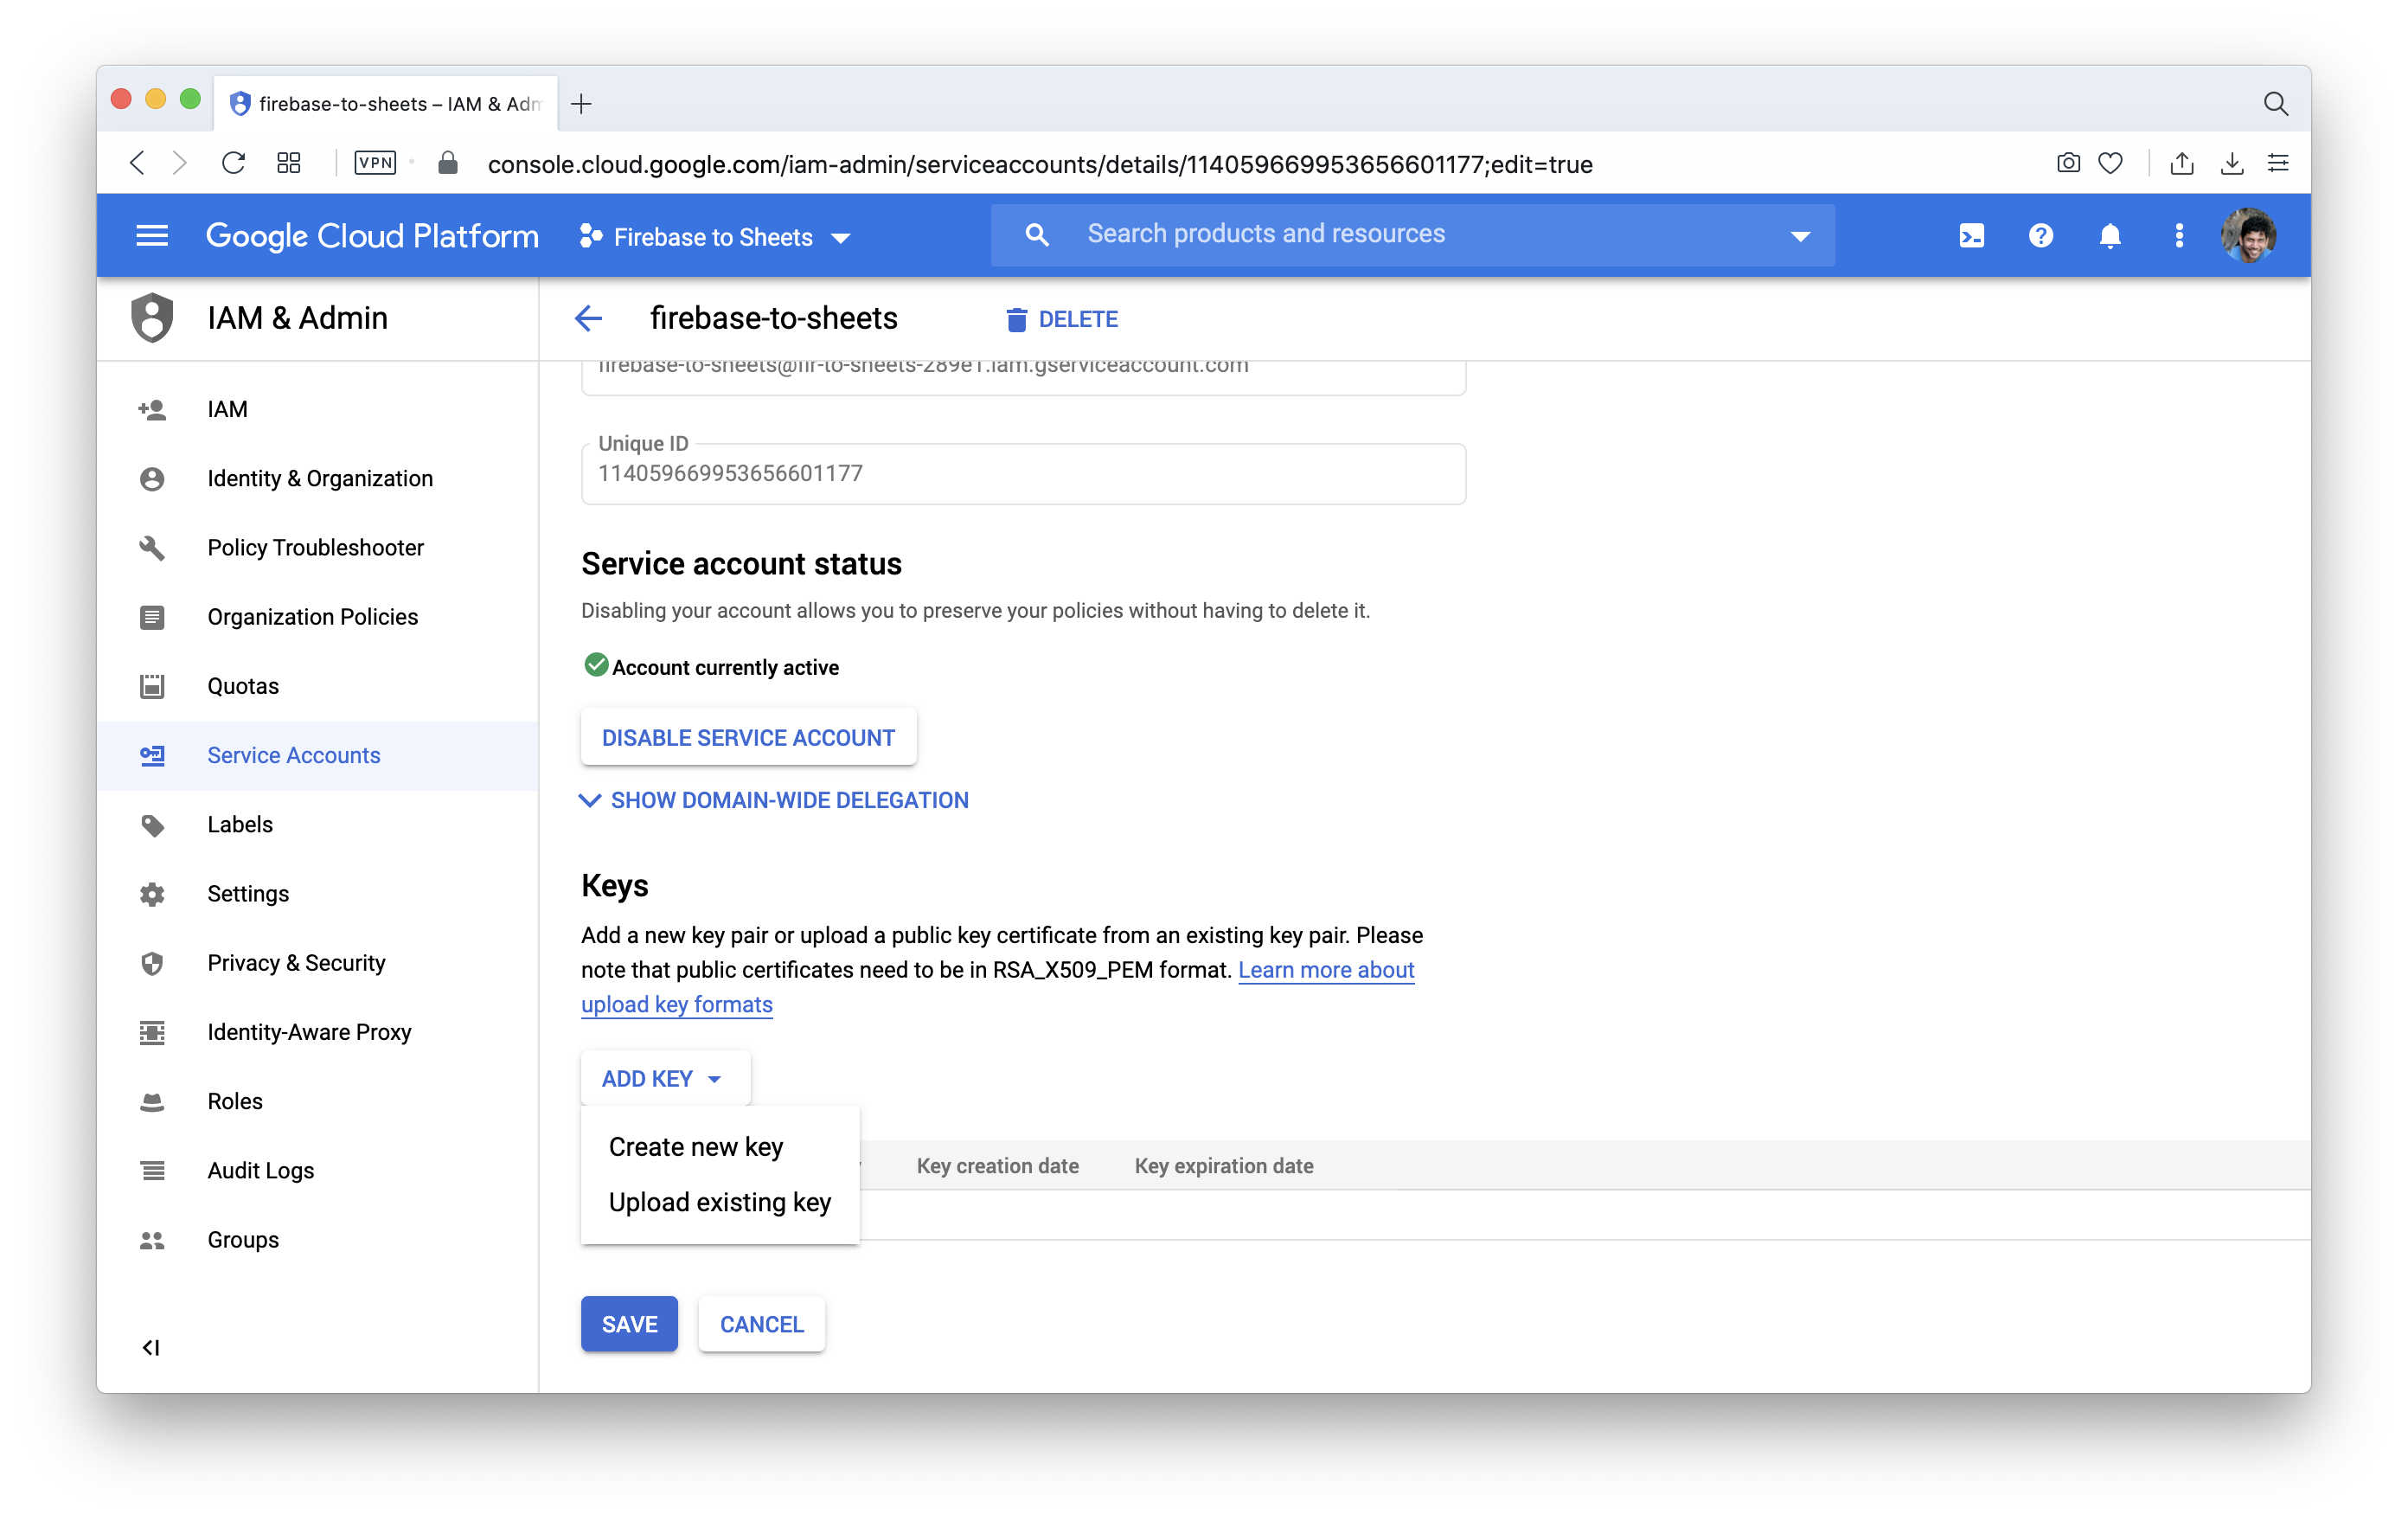
- Choose JSON and click on Create in the dialog.
- Store the downloaded JSON file in a safe location.
Step 4: Create a spreadsheet
Now create a new Google Sheet in which you would be storing your data. You can quickly create a new sheet by accessing sheets.new. Grab the id of the sheet.
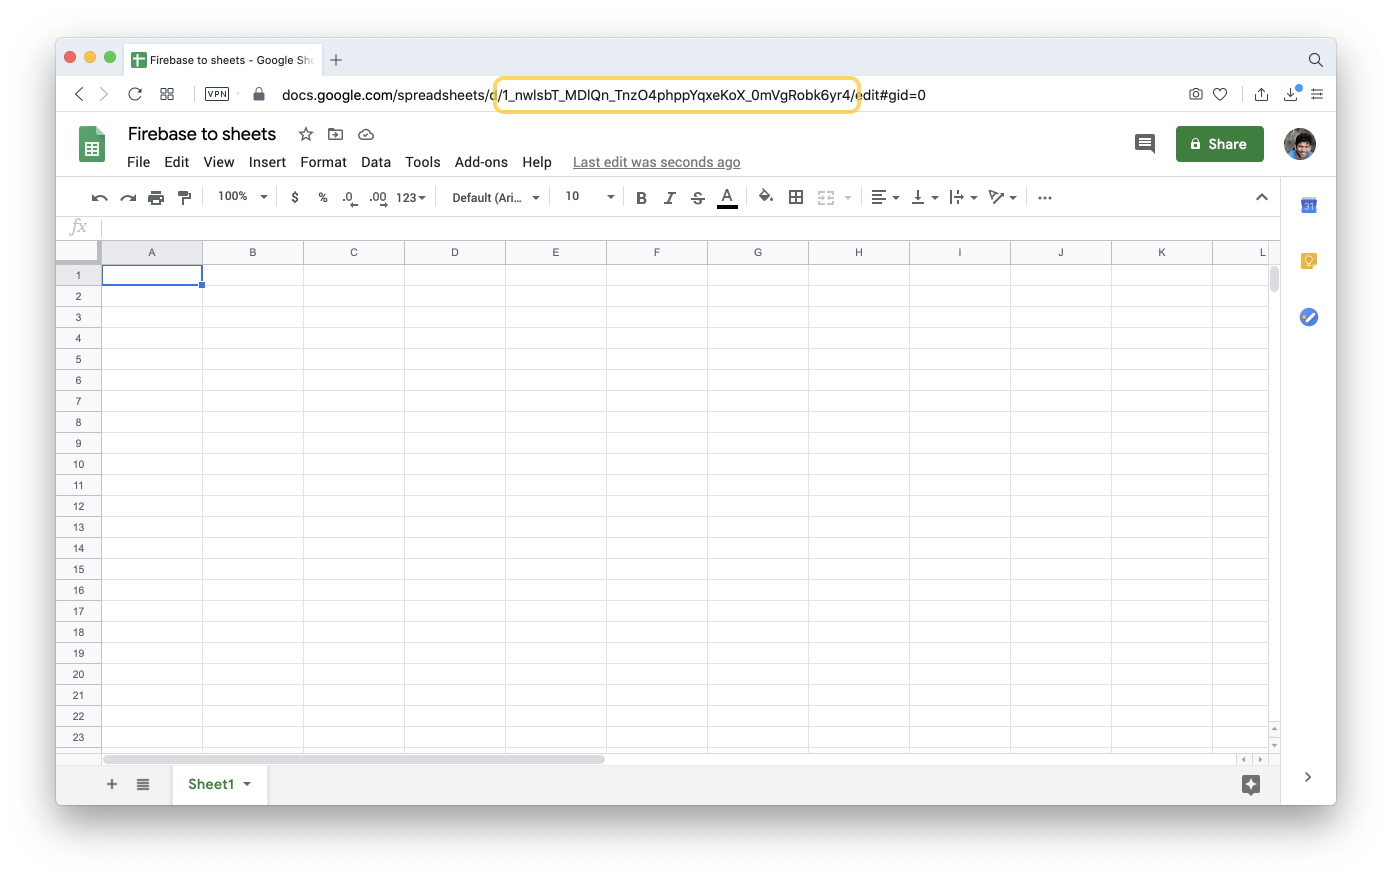
Share this sheet with the email address in your service account and give edit access to the same. In this case, I have to give edit access to the email address firebase-to-sheets@fir-to-sheets-289e1.iam.gserviceaccount.com.
It's important that you share your Spreadsheet with the service account, otherwise, the cloud function will not be able to write to the sheet.
Step 5: Setup cloud functions project
For this, you are expected to know how to use and set up a node js project along with a good understanding of firebase command line tools. To begin create a folder and run npm init
mkdir firebase-to-sheets
cd firebase-to-sheets
npm init
Answer the scaffold questions and you will be ended up with a project and just a package.json file.
Once that is done we have to initiate firebase. If you haven't already setup Firebase CLI this is required to deploy our cloud functions. Here is the github page if you need more help.
Assuming you have already setup firebase cli and logged into firebase, you can run the following command to init a firebase project and then select functions only and hit enter.
firebase init --project fir-to-sheets-289e1
You have to replace fir-to-sheets-289e1 with your own project id. You can find the project id in your firebase console. Or you can simply run firebase init and select the project from the list.

Follow through the questionnaire and select Javascript when prompted for language choice. Next, open up the project in VS Code.
Step 6: Install dependencies & write code
Cloud functions here are going to interact with the Google API using the service account and write data to the Sheets. So let's install the required dependencies in the functions folder
npm install firebase-admin firebase-functions googleapis@34 lodash --save
This will install the required dependence for our code.
Once that is done move your downloaded service account json file to functions folder. And copy the following code to your functions/index.js file. Replace your YOUR_SPREADSHEET_ID_HERE with your sheets id and also rename serviceAccount.json the file name of your choice.
const functions = require("firebase-functions");
const { google } = require("googleapis");
const sheets = google.sheets("v4");
const _ = require("lodash");

const spreadsheetId = "YOUR_SPREADSHEET_ID_HERE";

const serviceAccount = require("./serviceAccount.json");

const jwtClient = new google.auth.JWT({
  email: serviceAccount.client_email,
  key: serviceAccount.private_key,
  scopes: ["https://www.googleapis.com/auth/spreadsheets"],
});

const jwtAuthPromise = jwtClient.authorize();

exports.SyncToSheets = functions.database
  .ref("/products")
  .onUpdate(async (change) => {
    const jsonData = change.after.val();

    await jwtAuthPromise;

    const flatten = (data) => {
      var result = {};
      const recurse = function(cur, prop) {
        if (Object(cur) !== cur) {
          result[prop] = cur;
        } else if (Array.isArray(cur)) {
          for (var i = 0, l = cur.length; i < l; i++)
            recurse(cur[i], prop + "[" + i + "]");
          if (l == 0) result[prop] = [];
        } else {
          var isEmpty = true;
          for (var p in cur) {
            isEmpty = false;
            recurse(cur[p], prop ? prop + "." + p : p);
          }
          if (isEmpty && prop) result[prop] = {};
        }
      };
      recurse(data, "");
      return result;
    };

    let allKeys = Object.keys(jsonData);

    let firstElement = allKeys[0] || 0;

    let headerData = flatten(jsonData[firstElement]);
    let keys = Object.keys(headerData);

    let rows = [];

    for (const item in jsonData) {
      let val = jsonData[item];
      let row = [item];
      keys.forEach((key) => {
        row.push(_.get(val, key) || "");
      });
      rows.push(row);
    }

    let sheetData = [["id", ...keys], ...rows];

    let range = `Products!A1:${String.fromCharCode(
      65 + keys.length
    )}${allKeys.length + 1}`;

    await sheets.spreadsheets.values.update(
      {
        auth: jwtClient,
        spreadsheetId: spreadsheetId,
        range: range,
        valueInputOption: "RAW",
        requestBody: { values: sheetData },
      },
      {}
    );
  });
You can replace products with your own database path and also change the name Products in the range variable.
The piece of code String.fromCharCode(65 + keys.length) will only work for 26 column names, if you have more than 26 columns you have to create your own log to replicate the Google Sheets algorithm of range generation.
Step 7: Deploy
Now you can deploy the cloud functions using the deploy command. From within the functions folder run the following command
firebase deploy --only functions
Once the functions are deployed any change you make to the firebase database will be updated to the Google Sheets immediately.
Demo
If you feel fancy you can auto-create the sheets based on the endpoint if you use a wildcard reference to the database path. You can refer to the Google Sheets API documentation and tailor this to your needs.
If you like the post please feel free to share it with on twitter or leave a comment below. If you found any errors in this article, please feel free to edit on GitHub
